
 I just found the best instructions on how to make balloon arches and I just HAVE to share! This video demonstration provides crystal clear, step-by-step detail on how you can make a spiraling, three-color arch for your next party. (Don’t miss a resource for inspiring arch images at the end of this post!)
Sandi is a true professional balloon decorator based in San Diego who has been doing this for more than 15 years and runs her own company, Balloon Utopia. She has a growing YouTube channel with great ideas for making all kinds of things for those of us interested in DIY balloon decoration.
What I like best about this video is how much detail Sandi has given on how to actually construct the base of the arch and the steps involved in creating the pattern. Once you have the initial steps down, the rest is easy but it’s understanding the methods for securing balloons and starting the base that are the most complex and Sandi’s style of describing what she’s doing while she’s doing it is a natural teaching skill. In fact, I’m not sure she realizes just how good a demonstrator she really is!
Balloon Arches Video
Here’s the video on balloon arches:
Balloon Arch Instructions
Okay – let’s break down what Sandi said.
Most important is that the balloons be of the same size. Through trial and error, I can attest to that. If they’re not the same size, the balloon arch starts to become obviously lopsided and out of sync – especially when doing multi-colored arches.
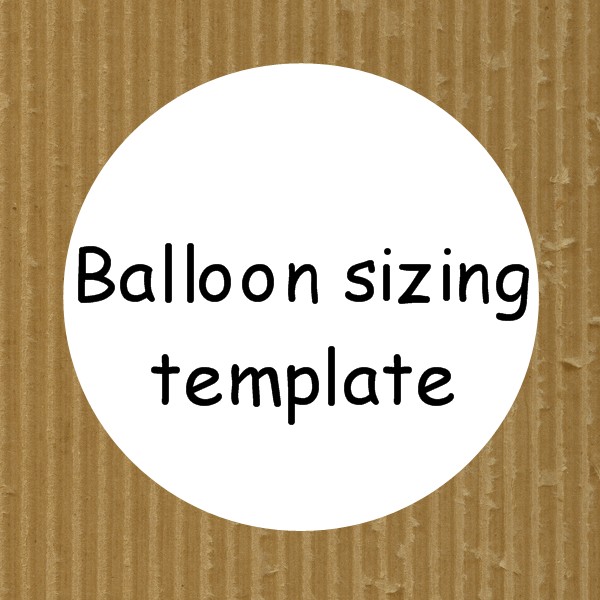
Here’s how to make a balloon arch using properly sized balloons:
- Get a piece of cardboard that is at least 16” x 16” and use a rotary knife or an Exacto knife to cut a circle into the cardboard that is 10-11” in diameter.
- Inflate a balloon but do not tie off the end.
- Pass the balloon through the circle. If the widest part of the balloon does not meet the edges of your circle when you pass it through, inflate it with more air. If it’s too large to pass through the circle, let out some of the air until you achieve a perfect fit.
- Hold the balloon closed at the neck while you inflate a second balloon.
- Copy the steps to get the second balloon to match the size of your cardboard template.
- Tie the two balloons together at their neck to form a balloon duplet.
- Continue making the duplets required for your balloon arch.
Starting Balloon Arches
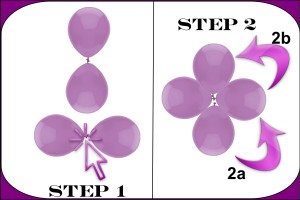
Balloon Quad Instructions
Cross the two duplets at their center so that you have a quad of balloons in a pattern: yellow, red, yellow, blue.
Tie together two un-inflated twisting balloons. This will act like string to tie your balloons together.
Wrap a length of the twisting balloons around your quad to secure the balloons together.
Take your next quad of balloons, nestle them into place.
Wrap more of your twisting balloon around this second quad of balloons.
Continue adding quads, nestling each one so that you can see the colors spiral around.
Balloon Arches with or without Helium
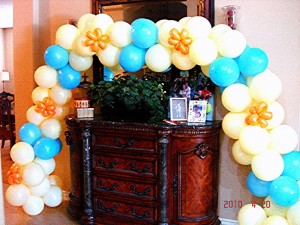
The other thing Sandi explained is that she would generally use helium for her balloon arches and would use poles for the sides instead of using un-inflated twisting balloons to secure the balloons. Although, the method she used for demonstration works for making short balloon columns. Just anchor them down with a base of some sort to keep them in place for your party. Remember, too, that short columns can be accented by attaching a Mylar balloon to the top in whatever theme suits your event.
Balloon arches WITH helium can be made without using any poles as long as they are anchored to something at each end, although a structure or support will help them stay in place and keep their shape.
Balloon Arch Without Helium
If you want a free-standing balloon arch without helium, you’ll need poles attached to sturdy bases for each side and a frame (shaped wire or PVC pipe) for the top that is curved to give the shape of the arch.
Balloon Arch Calculations
To calculate the number of balloons needed for your arch, determine how many feet long you want your arch to be and multiply that by 5. If you want a 20 foot balloon arch, you’ll need at least 100 balloons (for those of us who aren’t professionals, it’s best to add another 20% in case you run into issues with popping or deflating!).
If you’re doing a three color spiral as Sandi demonstrated, then half of your balloons should be the main color (yellow in the video), one-quarter should be spiral color #1 (blue in the video), and the remaining one-quarter should be spiral color #2 (red in the video).
For a 20 foot, three color spiral balloon like the one in the video, you’d need 100 balloons – 50 yellow, 25 blue, and 25 red.
If you’ve always wanted to learn how to make balloon arches but have been afraid to try, let me assure you that if I can do it, anyone can. Just copy the steps Sandi outlined in the video for a bit of practice and I bet you’ll be able to make an amazing arch the very first time you try.
Follow this link to see Balloon Utopia’s gallery for more ideas: Professional Balloon Arches.
4 comments for “Balloon Arches”