*This post may contain affiliate links for which I earn commissions at no additional cost to you.*
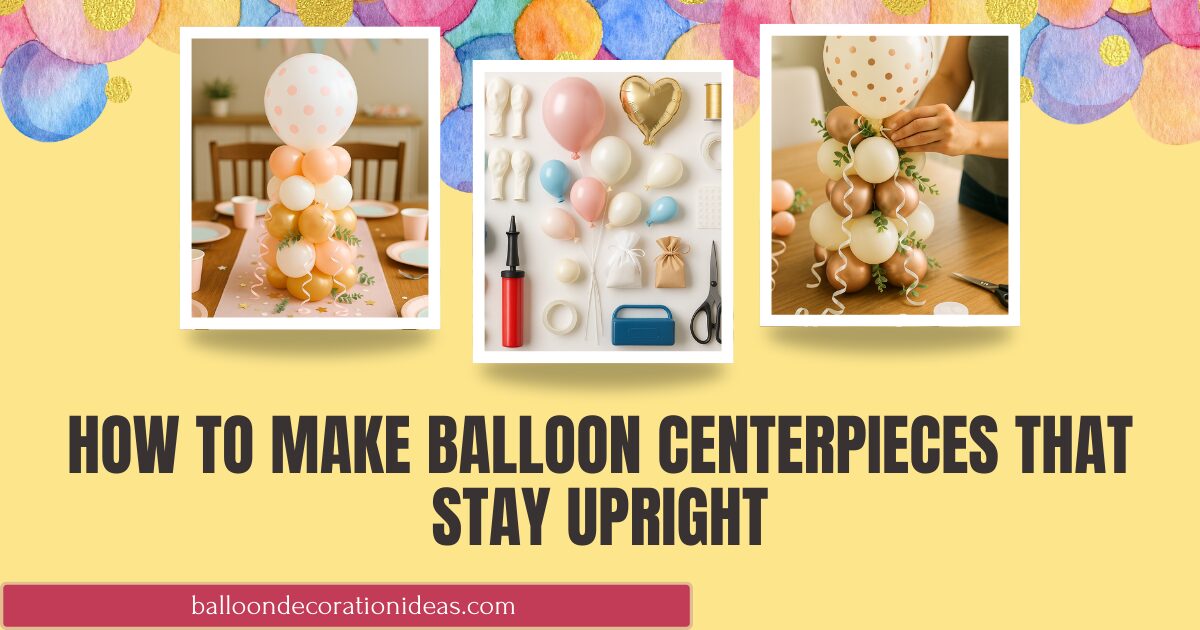
Spending time creating balloon centerpieces for a party only to struggle to see them stay upright as soon as your event starts is beyond frustrating. Wobbly bases and lopsided clusters seem to be the universal challenge.
The good news is that getting a balloon centerpiece to stand tall and stay put isn’t about superhuman crafting skills. It’s simply about building the right kind of foundation and layering your balloons in a way that naturally creates balance.

By the end of this tutorial, you’ll know exactly how to make a sturdy, pretty balloon centerpiece for birthdays, baby showers, holidays, or any table you want to dress up. No stress, no guessing, and no more centerpieces that faint at the first breeze.
Gathering Your Supplies
A stable centerpiece starts with the basics. You don’t need a lot, but the right tools make a noticeable difference in both speed and frustration levels. Here’s what I reach for every time.
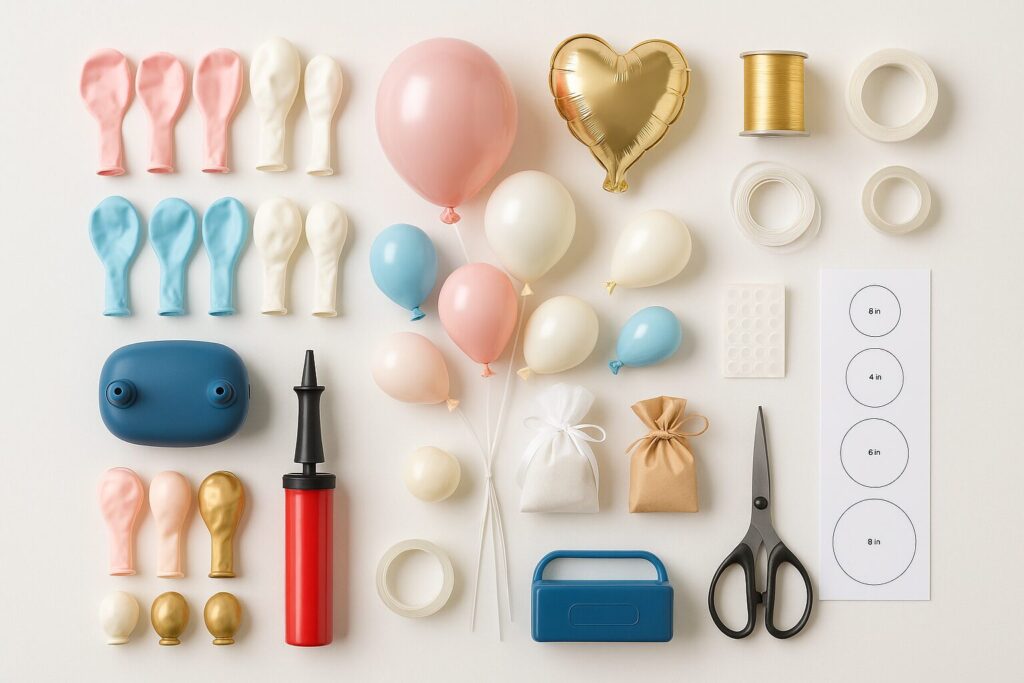
Balloons
- 5 inch balloons for your base clusters
- Optional 7 or 9 inch balloons for added height
- One specialty balloon for the top (a foil shape, a mini orb, or a patterned latex balloon)
Weights
- Small balloon weights
- Or a DIY option like a small bag filled with rice, beans, or even a handful of coins
(I’ve used all of these at different times depending on what I had closest in the pantry.)
Line or tape
- Balloon tying tape, curling ribbon, or fishing line
Optional but helpful:
- A balloon pump
- Glue dots
- A balloon sizer (Amazon sells small, inexpensive versions and they save you from eyeballing sizes)
If your balloons are rolling all over the table while you try to tie them, tuck them between two heavy books or wedge them against a wall. It keeps them corralled so you can actually use both hands.
Building the Base (The Secret to Staying Upright)
A sturdy base is what makes this whole project work. Most centerpieces fall over because the bottom cluster isn’t dense or even enough to counter the weight of the top balloon.
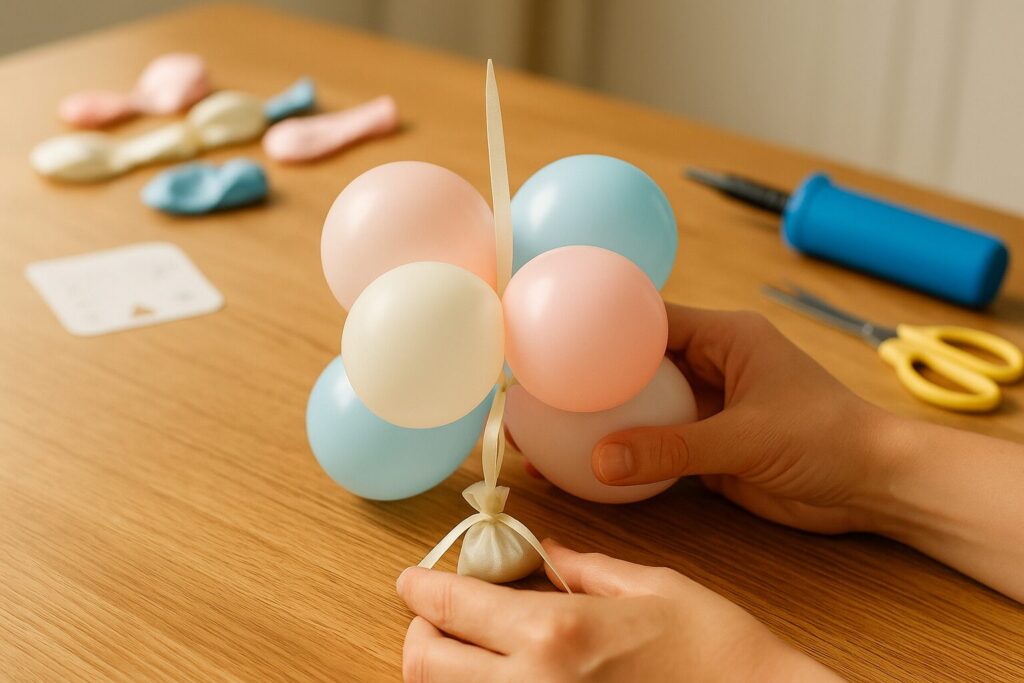
Step-by-step: Making a Solid Base Cluster
- Inflate four 5-inch balloons to the same size.
They don’t need to be big, just consistent. Smaller, tighter balloons create a heavier, sturdier base. - Tie them into two pairs.
- Twist the two pairs together to form a quad shape.
When the balloons “lock” into place, you’ll feel it. It shouldn’t wobble around. - Add a weight underneath the quad by tying the weight’s ribbon right into the center of the balloons.
If you’re using a DIY bag weight, nestle it right under the middle and wrap ribbon around two opposite balloons to secure it.
Pro Tip:
If your quad looks uneven, it’s almost always the balloon sizes. Deflate the largest one slightly rather than starting over. A quarter-inch difference matters more than you’d think in small balloons.
Creating Clusters for Height and Shape
Now for the part that gives your centerpiece its personality. These clusters stack to create height, fullness, and a natural taper toward the top.
How to Build Mid-Level Clusters
- Inflate another set of four balloons in the same 5-inch size or slightly bigger (6–7 inches if you’re mixing sizes).
- Make a quad just like you did for the base.
- Attach it to the base cluster by tying or twisting them together in the center.
If the centerpiece leans, rotate the top cluster until the weight redistributes. You’ll feel when it settles in.
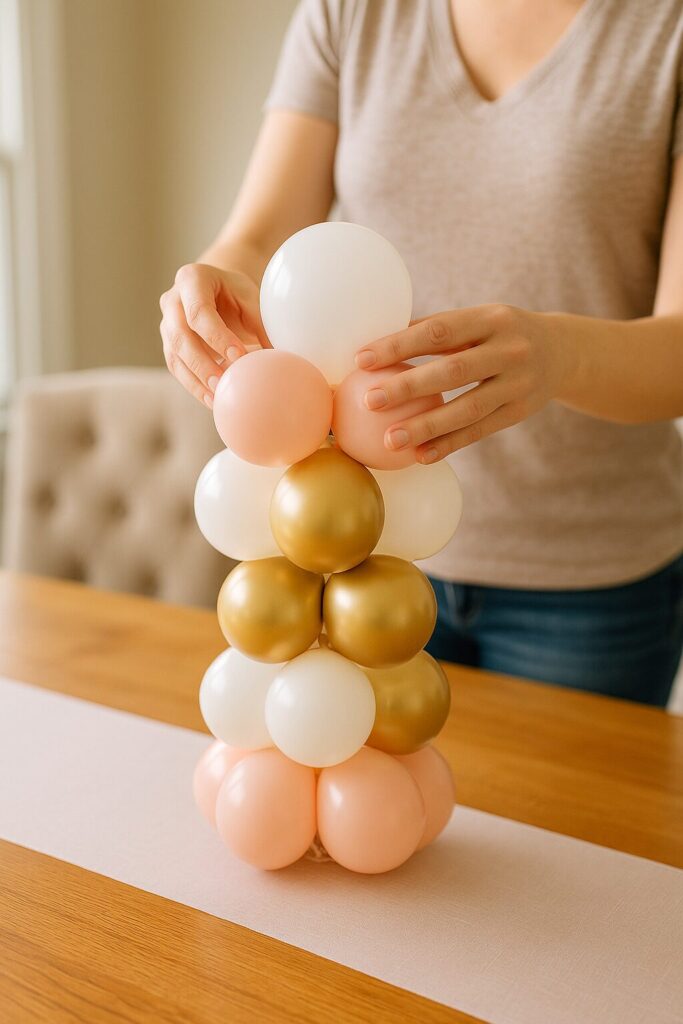
Optional Layer: A Third Cluster
A third quad gives you a fuller, more professional-looking shape. I usually create this one slightly larger than the middle cluster for a gentle “lift” that pulls the eye upward.
If spacing feels too loose, use a glue dot between two balloons to bring them closer without making them rigid.
Adding Your Top Balloon and Special Touches
This is where your design comes together and starts to look intentional instead of “Oh look, balloons in a pile.”
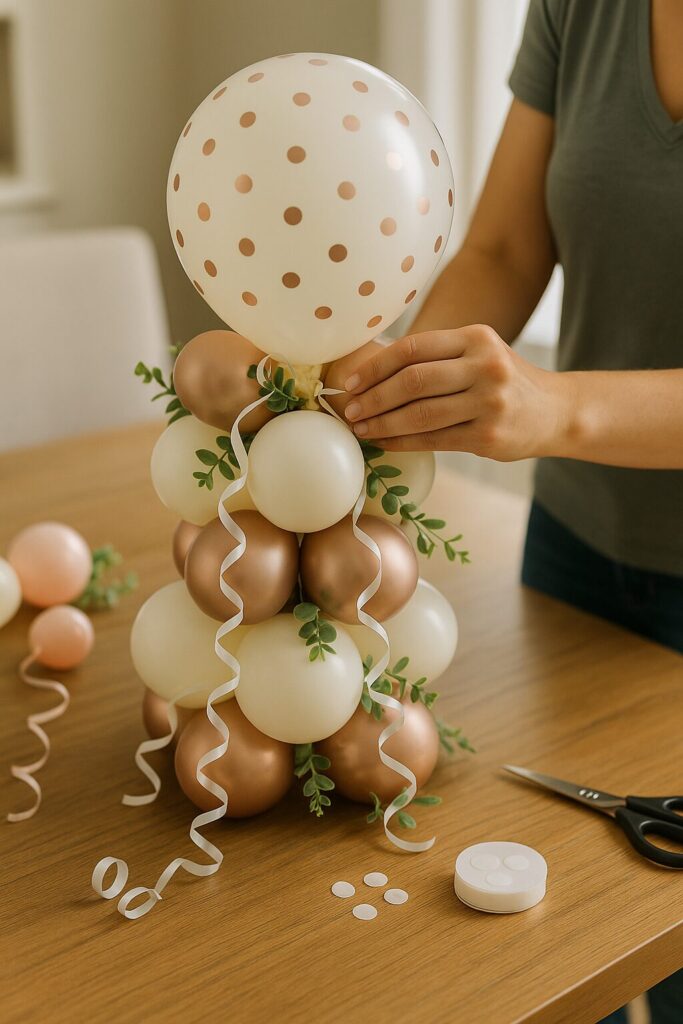
Attaching the Top Balloon
- Inflate your specialty balloon.
- Tie a long string or fishing line to its neck.
- Weave that line down through the clusters until it reaches the base.
- Secure it around the ribbon from your weight or around the center of the balloons.
The top balloon should float or sit neatly above the cluster stack, not lean wildly to one side. A little tug here or there usually corrects it.
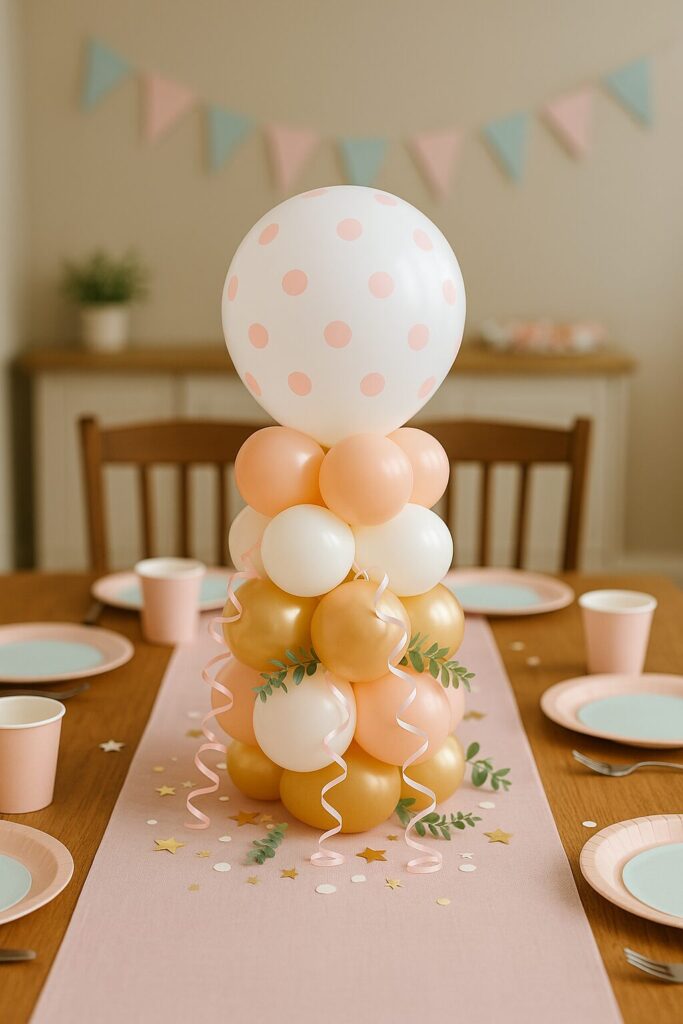
Decorating the Final Look
A few ideas I’ve used many times:
- Mini 5-inch accents: Add small single balloons with glue dots near the top cluster to make it look fuller.
- Curly ribbon: Cut a few strands and tie them at the base of the top balloon so they drape through the cluster. They add movement without clutter.
- Greenery or faux flowers: Tuck sprigs between balloons for baby showers or garden parties.
- Themed touches: Small paper cutouts (stars, hearts, tiny animals) can be taped to picks and tucked in.
If your centerpiece feels too tall, remove the top cluster or downsize your top balloon. If it feels too squat, lengthen the fishing line under the top balloon so the whole piece breathes a little more.

Easy Step-by-Step Checklist
Troubleshooting
- It still tips over: Check the weight. Add a second small weight or use heavier filler in your DIY bag.
- Clusters wobble: Balloon size mismatch. Deflate one slightly.
- Top balloon leans: Retie the top line so it anchors directly toward the base weight.
- Centerpiece won’t stay centered on the table runner: Add a small piece of museum putty under the weight.
Helpful Tools I Recommend
- Electric Balloon Pump: Cuts inflation time in half and keeps your sizes more consistent. Mine has definitely earned its shelf space.
- Balloon Sizer Box: Not essential, but wonderful for beginners. No more guessing or comparing everything to a coffee mug.
- Balloon Glue Dots: These are my secret for filling small gaps. They hold well but peel off without tearing balloons.
Conclusion
Once you get the hang of building balanced clusters, balloon centerpieces become one of those projects you can whip out in minutes even on a hectic party day. They’re sturdy, customizable, and surprisingly fun to build.
I hope this helps you create something beautiful for your next celebration!