*This post may contain affiliate links for which I earn commissions at no additional cost to you.*
A friend once texted me a photo from her baby shower and I swear the centerpieces were doing all the heavy lifting. Not the cake, not the backdrop, not even the punch bowl (and you know I love a good punch bowl), it was these soft, glowy little balloon stacks with tiny bear toppers that made everything look expensive and sweet at the same time.
That’s the vibe we’re going for here: soft glam teddy bear tea party centerpieces with champagne + blush balloons, satin bows, and little bear toppers. Think “dainty and cozy,” not “giant balloon chaos that blocks Aunt Linda’s view of the gift table.”
Below are a few style directions you can mix and match, plus how I’d build each one at home without needing a full balloon studio in the garage.
The Soft Satin Stack
This style is classic tea party with a little glow-up. It looks polished, but it’s honestly one of the easiest ways to get a centerpiece that feels “event-ready.”
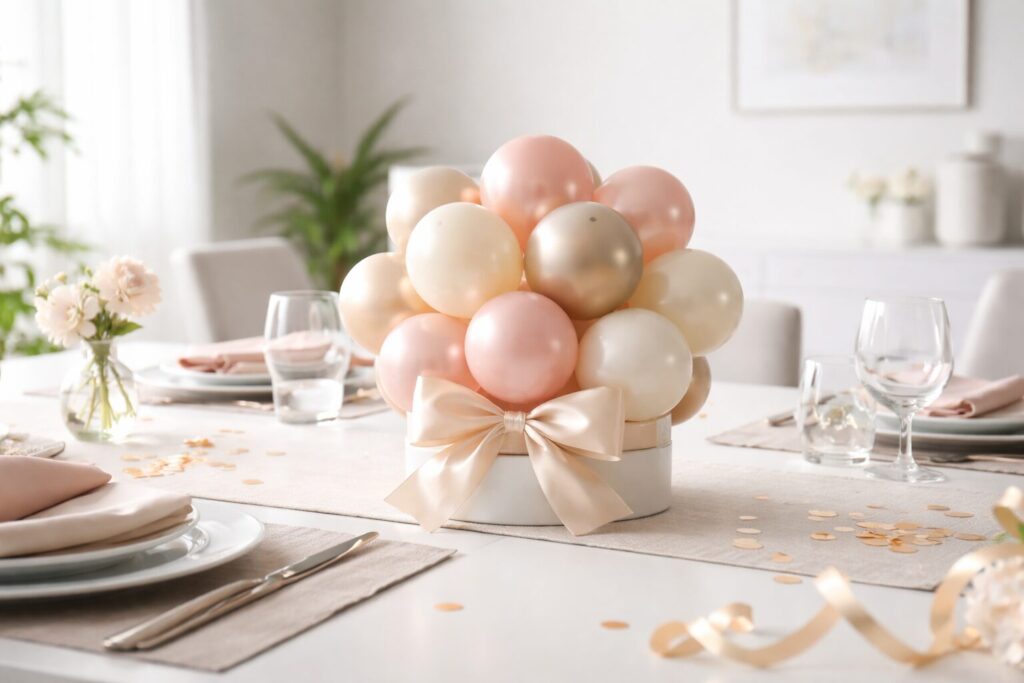
Look 1: Champagne + blush balloon stack with a bow collar
Picture a small stack of balloons in soft champagne, blush, and creamy white, like a tiny balloon sundae sitting in the middle of the table. The balloons are clustered tight, not airy, so it looks intentional and tidy. Around the base is a satin bow “collar,” which makes it feel like a gift.
Where it shines: Guest tables, gift table, or lined down the center of a long table as repeating mini moments.
How to make it (beginner-friendly):
- Inflate 5-inch balloons in champagne, blush, and white. You’ll want about 9–13 balloons per centerpiece, depending on how full you want it.
- Make two small quads (4 balloons twisted together) and one mini trio for the top.
- Stack them by tying or wrapping with balloon string, then tuck the extra balloons in like you’re filling gaps in a flower arrangement.
- Add a small bear topper (a little plush pick or a bear head on a stick). Position it slightly off-center so it looks styled, not like it’s standing at attention.
- Tie a satin bow around the base, right where the balloon cluster meets the weight or cup.
Practical notes:
- If your balloons look too “samey,” add one pearl balloon in the mix. Just one. It gives depth without turning the whole thing into a disco ball.
- Use a small tabletop balloon weight or a water-filled cup hidden in a pretty container. Outdoors, I’m team “add more weight than you think you need,” because wind loves drama.
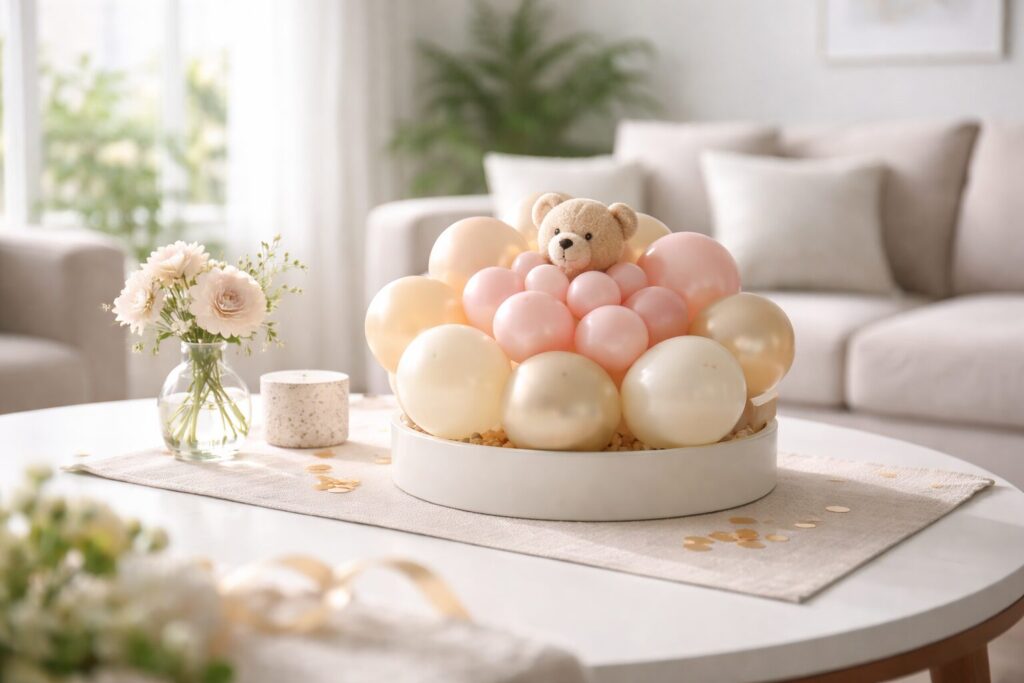
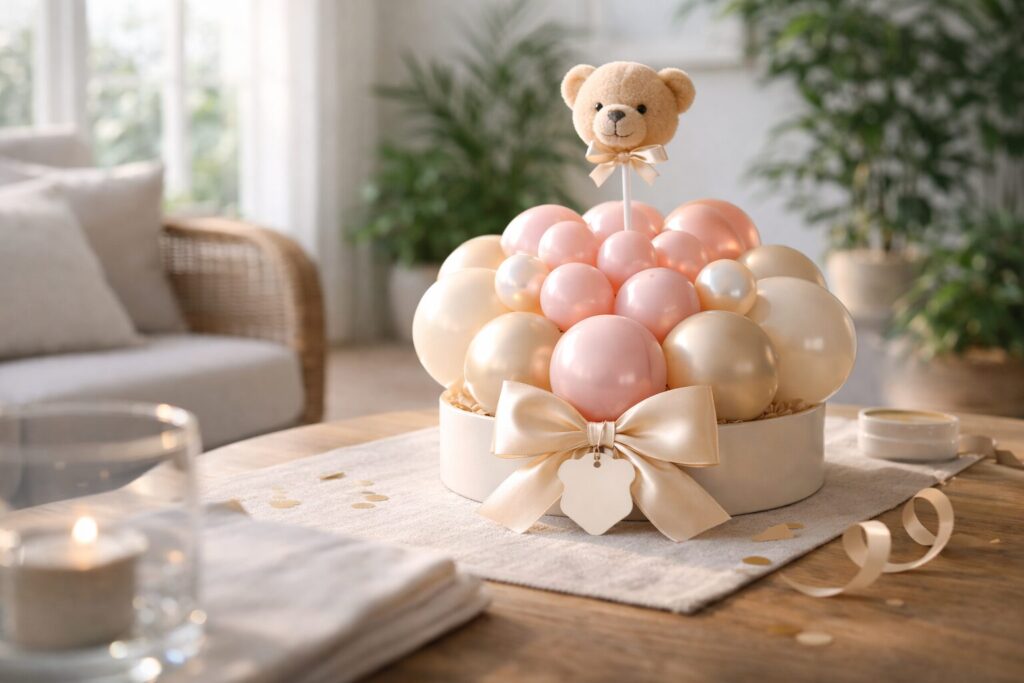
Look 2: Double-layer “tea rose” cluster with bear peeking out
This one feels extra soft because you build it like a rose bloom. The outer layer is champagne and cream, and the inner layer is blush, like the balloon version of a fancy macaron.
Where it shines: Dessert table corners, the welcome table, or as a taller centerpiece on a lower table.
How to make it:
- Inflate two sizes: mostly 5-inch balloons, plus a few 9-inch balloons for the outer layer.
- Build a loose outer ring with the 9-inch balloons (champagne + cream).
- Nestle the smaller blush balloons in the center so it looks like a “bloom.”
- Place your bear topper so it looks like it’s peeking out of the blush center, not just sitting on top. It reads sweeter, like a little surprise.
Practical notes:
- When you mix sizes, inflate the larger balloons slightly under full so they look softer and more luxurious.
- If you’re doing this for multiple tables, inflate all balloons first, then assemble. Assembly goes fast when you’re not stopping to inflate every two seconds.
The Bow-Forward “Gift Box” Centerpieces
If you want your centerpiece to feel like a present, this is the category. The bow becomes the star, and the balloons act like soft tissue paper.
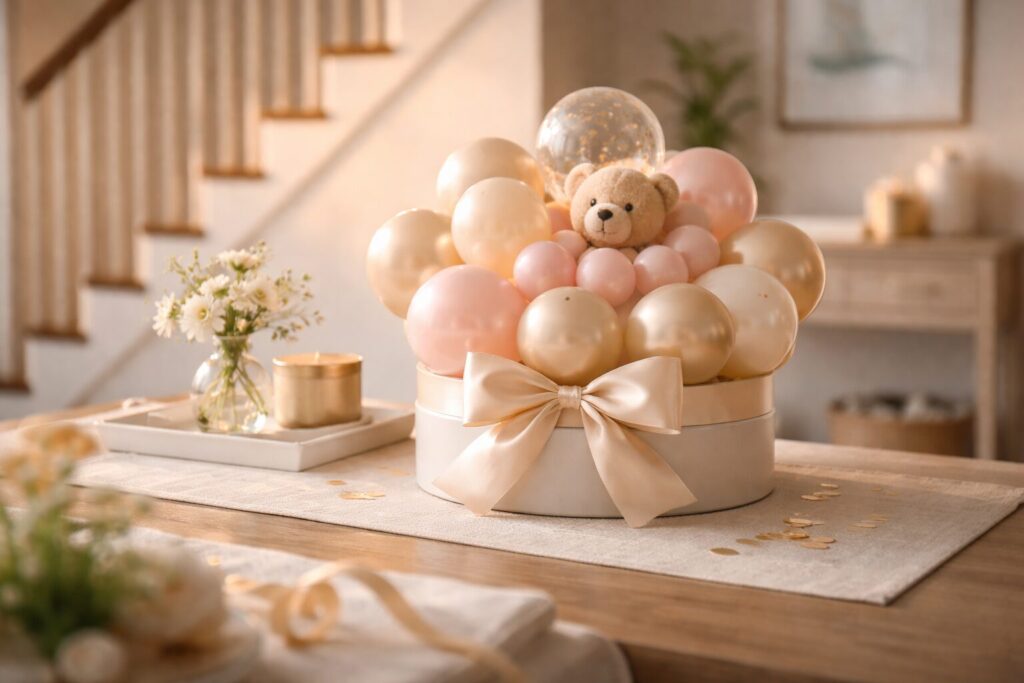
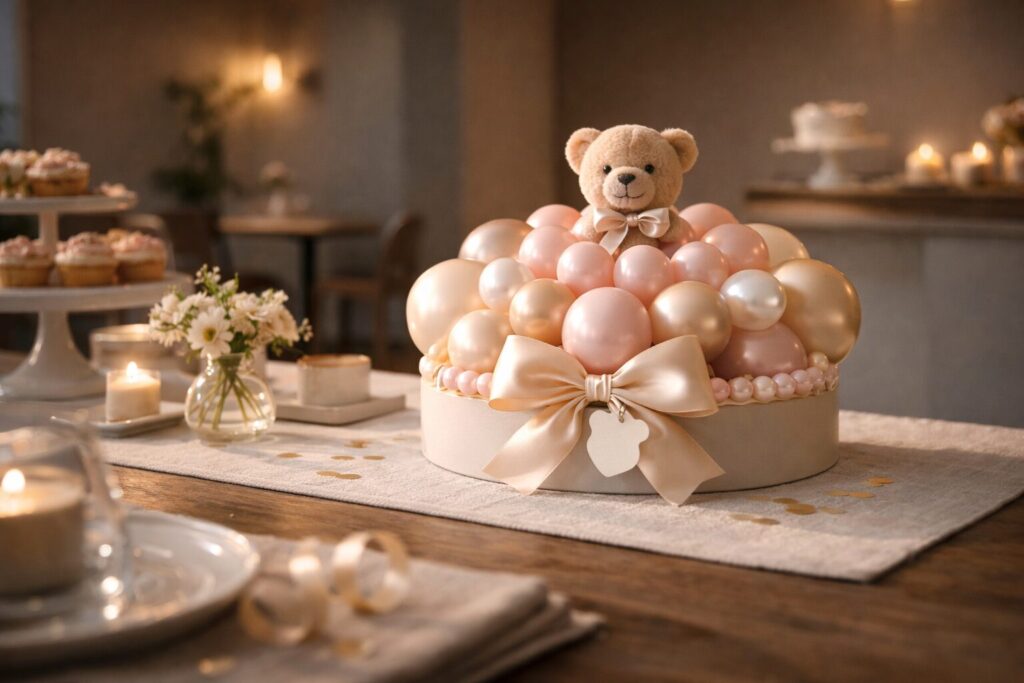
Look 1: Balloon bouquet coming out of a hat box
This is one of my favorites because it looks high-end, but the base does most of the work. Picture a round hat box (white, blush, or a subtle floral print) with a cluster of blush and champagne balloons rising out of it. Add a satin bow on the box and suddenly you’re in fancy tea party territory.
Where it shines: Head table, entry table, dessert table, or as a “statement” centerpiece for a smaller party where you don’t need ten of everything.
How to make it:
- Grab a hat box or sturdy round box. If it’s lightweight, drop a small bag of rice or a sand-filled zip bag inside to keep it grounded.
- Use a piece of foam (or crumpled paper tightly packed) inside the box to hold sticks/picks.
- Inflate a mix of 5-inch balloons and a few 9-inch balloons. Keep the palette tight: champagne, blush, cream, maybe one clear balloon with subtle confetti.
- Attach balloons on sticks and arrange them like a bouquet, lowest in front and slightly taller in the back.
- Add your bear topper toward the front, like it’s “in” the bouquet.
Practical notes:
- If you do confetti balloons, use them sparingly. Too many and it turns into New Year’s Eve instead of tea party.
- A wired satin ribbon bow holds its shape better than floppy ribbon. Floppy ribbon is pretty too, it just has a “soft” look instead of crisp.
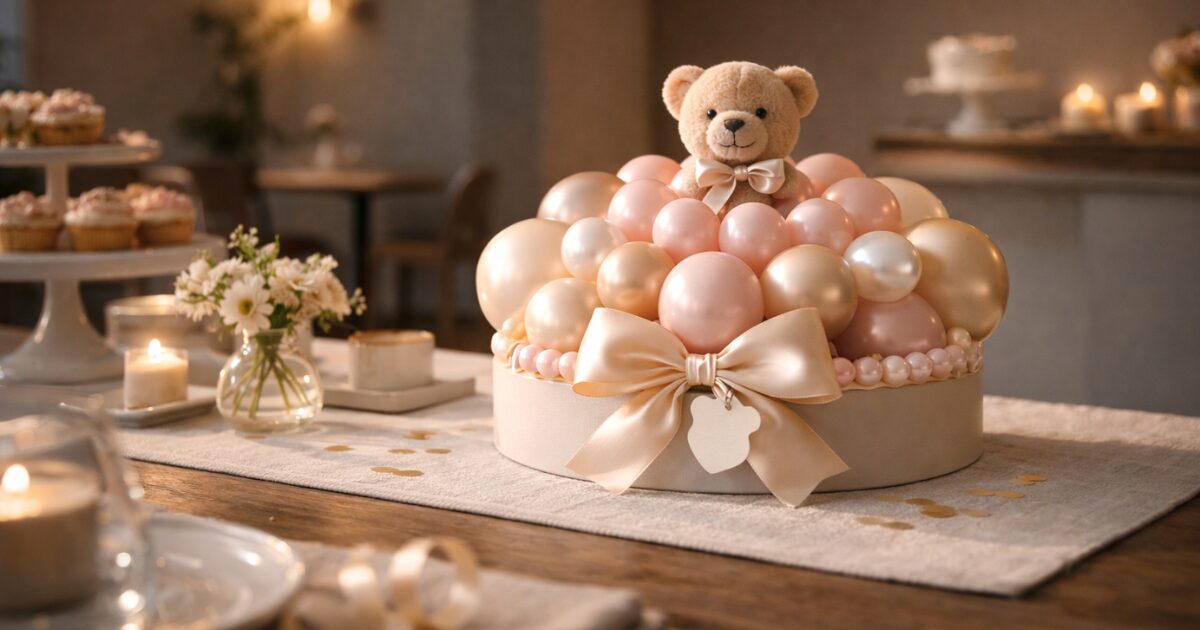
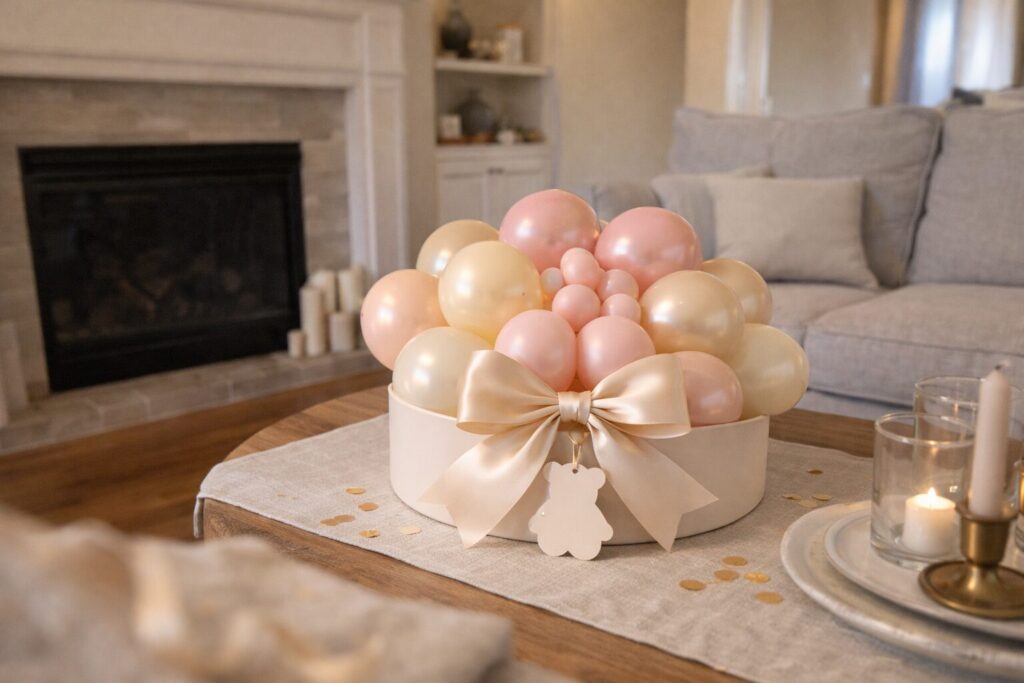
Look 2: Low balloon “puff” with an oversized bow and bear tag
This one is simple and adorable. The balloons sit low, the bow is oversized, and you add a little bear tag like it’s a gift label.
Where it shines: Small tables, kids’ table, or anywhere you need something cute without blocking faces.
How to make it:
- Inflate all 5-inch balloons, about 8–10 total. Keep them tight in a low mound.
- Secure to a small weight or inside a low container.
- Make one oversized satin bow, then add a smaller bow layered on top if you want that boutique feel.
- Add a little bear tag (printed or handmade) that says something like “Baby Bear Tea Party” or the guest of honor’s name.
Practical notes:
- This is a great option if you’re limited on helium or you just don’t want to deal with it. Air-filled centerpieces are less fussy.
- If you need height without bulk, add a thin acrylic stick with a bear topper instead of more balloons.
The “Little Luxe” Teddy Bear Topper Moments
This section is all about making the bear feel intentional, not like you just plopped a toy on top of balloons (we’ve all seen that, and we can do better).
Look 1: Bear sitting on a mini balloon pedestal
This looks like a tiny stage. A small balloon base, a neat top platform, and a bear sitting like it’s the guest of honor.

Where it shines: Cake table, dessert table, or as the centerpiece for the tea set display.
How to make it:
- Build a sturdy base using 9-inch balloons (4–6 balloons total).
- On top, add a tight cluster of 5-inch balloons in blush and champagne.
- Use a small flat piece of cardstock or a mini acrylic circle as a “platform” if your bear needs a stable spot.
- Sit the bear on top and add a tiny satin bow around its neck or ear.
Practical notes:
- If the bear is plush and top-heavy, secure it with a little removable adhesive or a hidden skewer. Nobody needs a bear taking a dive into the teacups mid-party.
- Keep the pedestal base slightly wider than the top cluster so it doesn’t wobble.
Look 2: Floating bear head topper with balloon “pearls”
This one feels extra glam without being flashy. Imagine a soft cluster of blush and champagne balloons, and tucked around them are a few small pearl balloons like accents, then a bear head topper hovering above like a cute little mascot.
Where it shines: Photo spot side tables, welcome table, or as repeating centerpieces for a more grown-up tea party vibe.
How to make it:
- Use mostly 5-inch balloons for a compact cluster.
- Add 2–3 pearl balloons (also 5-inch) spaced evenly, so it looks like “jewelry” around the arrangement.
- Place the bear topper on a clear stick so it floats just above the balloons.
- Add a satin bow at the base, or tie a small bow to the topper stick for a subtle detail.
Practical notes:
- Pearl balloons show fingerprints more than matte balloons. If that will bother you, give them a gentle wipe with a soft cloth before placing them.
- Clear sticks or acrylic rods make everything look cleaner in photos.
Look 3: “Tea party trio” centerpiece with bear, bow, and tiny balloon garland
This is like a mini scene. A small base, a short garland draped across the front, and the bear nestled into it like it’s hosting tea.
Where it shines: Dessert table, gift table, or as the centerpiece for a tea-party-themed snack station.
How to make it:
- Use a low container (small tray, a shallow box, even a cake stand base if you’re careful).
- Build a compact balloon mound in blush + champagne.
- Create a tiny garland strand using 3-inch balloons or tightly inflated 5-inch balloons, then drape it across the front like a little balloon necklace.
- Nestle the bear into the center, then add a satin bow tucked on one side.
Practical notes:
- A tiny garland gives you texture without adding height, which is perfect for table conversations.
- If you don’t have 3-inch balloons, just inflate the 5-inch ones smaller. You’re basically making “baby balloons,” which sounds ridiculous but works.
Practical wrap-up tips (the stuff I always learn five minutes too late)
- Champagne + blush works best when you add one “calm” neutral, usually cream or white. Without that neutral, the colors can start to look too warm and muddy in indoor lighting.
- Mix sizes on purpose. Even one size jump, like 5-inch plus a few 9-inch, creates depth fast. Same-size clusters can look a little flat.
- Keep bows consistent across the room. If you use satin bows on centerpieces, repeat that ribbon on chair backs, favor bags, or the dessert table. It makes everything feel planned, even if you were assembling it at midnight.
- For small spaces, go low and wide. A low balloon “puff” centerpiece still feels full, but it won’t block faces or make the table feel crowded.
- AI inspiration is great for color and mood, but reality needs structure. The prettiest inspiration images don’t always show weights, stability, or how things survive a breeze. Build your base sturdy first, then make it pretty.
You Can Do It!
If you’ve been staring at teddy bear tea party photos thinking, “Sure, but I don’t have a balloon studio,” I promise these are doable at home. Start with one centerpiece style, keep your color palette tight, and give yourself permission to make a few “test clusters” first. (My first tries are always a little lumpy, and then suddenly the next one looks like I know what I’m doing.)
If you want a next step, pair this with a simple mini garland for the dessert table, then your centerpieces will look like they belong in the same little party universe. And if you try one of these looks, I hope you have as much fun styling the bows as I do, because apparently that is my personality now.
